Wireless Networking with Raspberry Pi

The Raspberry Pi is great and I really enjoy it, but I couldn’t help to think that it would greatly benefit from wireless capabilities. I can only assume for cost reasons they didn’t ship it with onboard wireless networking (the newly announced Raspberry Pi 2 does not have wireless either).

This morning I received the Edimax EW-7811Un Wi-fi USB Adapter in the mail that I ordered a few days ago. (Thanks Amazon for the free Sunday delivery!) A little bit about this USB Adapter – it’s a super tiny thumb-sized USB-based Wifi adapter that is capable of connecting to b/g/n networks that doesn’t require external power. It also runs the Realtek RTL8188CUS chipset which is widely supported by many Raspberry Pi distros, including Raspbian 2014-09-09, the OS that I am running.

Adding the Edimax Nano Wireless USB Adapter doesn't add too much bulk.

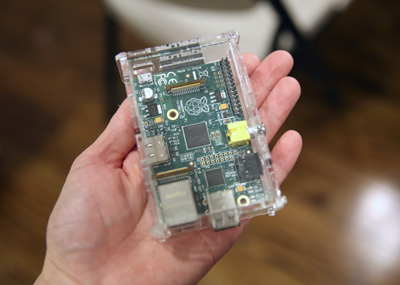
Adding the Edimax Nano Wireless USB Adapter doesn’t add too much bulk.

Side shot with the USB adapter installed.

Side shot with the USB adapter installed.

Setup is easy.

Plug in the USB adapter into an available USB port on the Pi, and power on the Pi. You will need a keyboard at the very least, or if you’re running in headless mode, you will need it to be plugged into a network cable so you can SSH remotely into it.

Edit the network interfaces file like so in your editor of choice (emacs, obviously, being the best choice):

You’ll see some configuration in here by default, you’ll want to replace it with the configuration below. You’ll want to type your Wireless SSID and Password in for where I’ve put placeholders (you will want to retain the double quotes):

At this point you will want to restart networking, you can do so by issuing the following command:

From here, running ifconfig will list all of the active network interfaces – if you see a valid IP next to wlan0 then we’re in business; you can disconnect your ethernet cable and congratulations, you’ve cut one more cord from the awesomeness that is the Pi!

As a side note, as normally, ethernet will continue to work as a separate interface. i.e. Raspbian will assign through DHCP an IP to eth0, as well as an IP to wlan0 if both a Wireless connection and Ethernet connection is made. This is redundant so it’s discouraged, but useful in case you are having trouble with wireless and need to fall back onto Ethernet to do some troubleshooting.

Raspberry Pi + HDMI CEC + Node.js

I’m a huge fan of Google’s Chromecast. I’m an even bigger fan of the little-known HDMI CEC protocol originally introduced with HDMI 1.0, which is a spec that allows devices to control CEC-enabled devices through HDMI. This is the technology used by Google that allows Chromecast to turn a TV on from a standby state and automatically switch to the appropriate input when you cast a video stream to the device from a remote client. While this has been a great feature which I frequently use with my Samsung HDTV (Samsung refers to HDMI CEC as “AnyNet+”), it’s unfortunate that there was no option to turn off the TV from a remote client.

After doing some additional research I quickly learned that HDMI CEC is rather capable with what it allows a client device to do and that it does so much more than just turning on or off a device – OSD Display, Device Menu Control, Routing Control, System Information, Timers, Status, to name a few.  I was ecstatic!

After digging even deeper I learned that my Raspberry Pi Model B fully supports HDMI CEC, and the fine folks at Pulse-Eight have developed a fairly mature C++ based library to control rudimentary CEC functions. While this was a great option, it required me to maintain an SSH connection into my Raspberry Pi which was less than ideal (I’m so lazy that I can’t reach for the remote control, what makes you think I’ll SSH in to issue a command line to my Raspberry Pi to turn off my TV?).

rpi

The palm-sized Raspberry Pi Model B computer!

I decided to wrap the lib-cec C++ library in a quick and dirty Node.JS Express Framework app so that I could remotely send commands from my phone over a web server. The core piece of my app is contained here, which enables the “on”, “off” and “status” functions of the CEC protocol, and pipes the output to the web client for the user to see:

The app routes are invoked when the user accesses the URL path for “on”, “off”, or “status”. I modified my Firewall’s Iptables to port forward the app so I can even check on my TV from outside my network, and it works like a charm! I can now control my TV from my iPhone, which means…

achievement_laziness

Full code can be seen in  my GitHub project page found here. Feel free to help me clean it up 🙂
https://github.com/dan-nguyen/hdmi-cec-node-test/